For the complete documentation index, see llms.txt. Markdown versions of documentation pages are available by appending
.mdto page URLs; this page is available as Markdown.
How to provide variable installments
Create loan account with variable installments
To create a loan account application for a client, select the client by searching the desired client from Global Search. Click the General tab.
- On the Client page, Click +New Loan on the bright blue action bar.
- Select the loan product to base the loan account on from the product list.
- Complete the loan account fields, making any modifications from the default that are permitted and applicable to the loan application.
- Click Submit.
The loan account application will be created with a status of Pending Approval. Your financial institution will define the workflow and permissions for approving loans.
Note:- You could provide the variable installments at the Loan in pending for approval status.
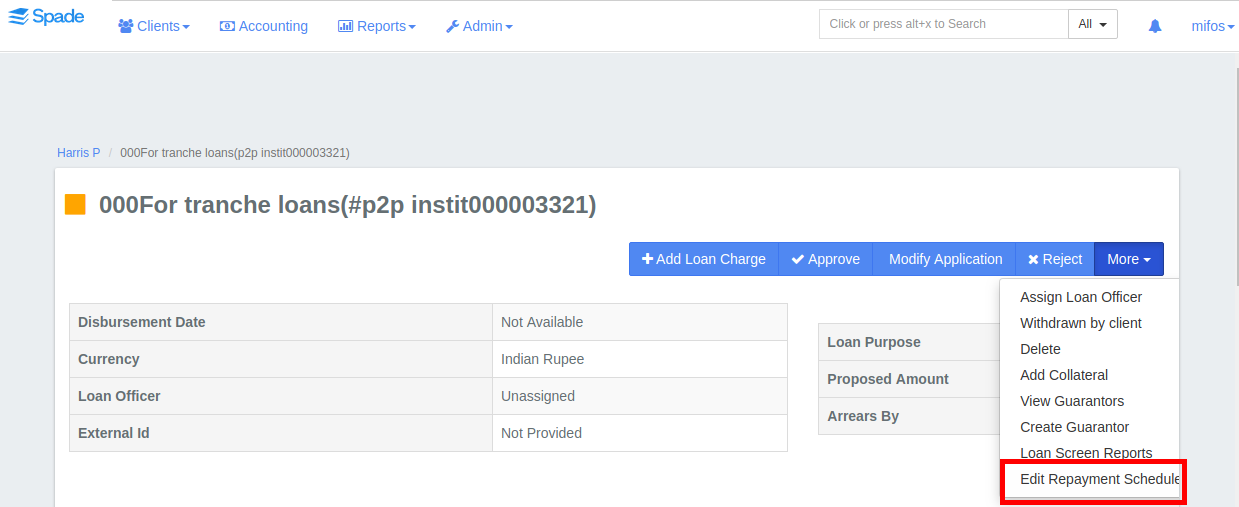
Step 1) Go to Existing loan account>>Pending Approval status.
Click on More>>Edit repayment schedule
Step 2 - i)
a) Showing repayment schedule
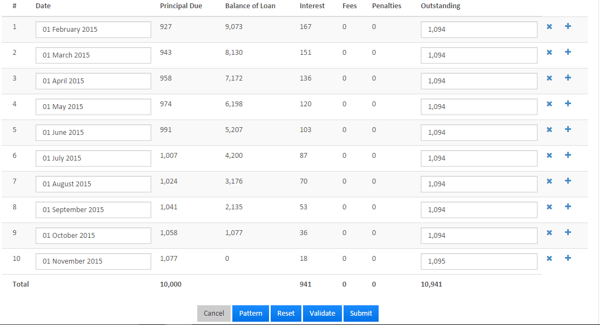
b) An example in the screen shot below:
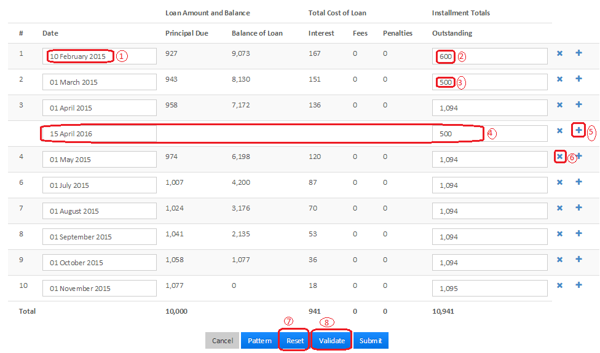
1 - Changed date to 10th, February from 1st, February.
2 - Changed amount to 600 from 1094.
3 - Changed amount to 500 from 1094.
4 & 5 - Created new installment by using + button prior to this installment.
6 - "x" use this button to remove installment.
7 - Click on Reset button to reset values to normal installment schedule.
8 - Click on Validate button to validate updated details.
Then click on Validate and submit button.
Step 2 -ii) Using pattern
a) Creating pattern, Click on Pattern button
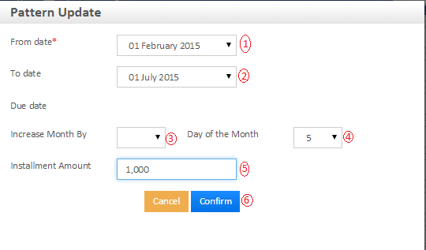
1 - From date - Provide from date. In this example: 1st February.
2 - To date - Provide to date. In this example: 1st July.
3 - Increase month by - Provide increase by month. In this example: None.
4 - Day of the Month - Provide day of the month. In this example: 5th
5 - Installment amount - Provide installment amount. In this example: 1000
6 - Confirm - Click on confirm button.
b) Viewing created pattern, a screenshot below showing a created pattern and schedule.
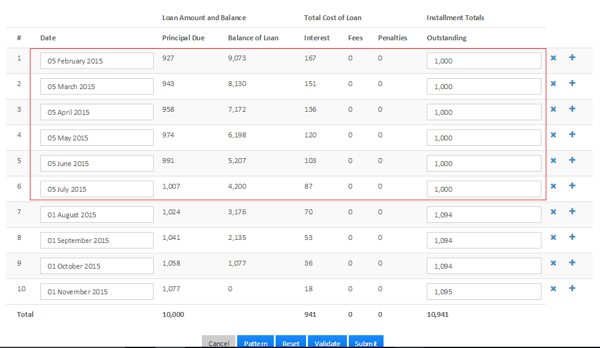
Then click on submit and complete the loan process.
{% hint style="warning" %} Key Error Messages
validation.msg.loan.variable.schedule.amount.update.not.allowed.for.last.period ------ Let the sheet calculate the last period using the "Validate" button. Do not change it yourself.
validation.msg.loan.variable.schedule.insert.not.allowed.after.last.period.date ----- Do not add payments after the set close date. {% endhint %}