For the complete documentation index, see llms.txt. Markdown versions of documentation pages are available by appending
.mdto page URLs; this page is available as Markdown.
Message Gateway Configuration
{% hint style="info" %}
Software Prerequisites
Note:- The softwares mentioned below are MANDATORY prerequisites. Note that only the versions mentioned below are required.
- Java Development Kit (version 1.8.0_65 & above)
- MySQL Server (version 5.5 or 5.6)
- Apache Tomcat (version 7.0.64.0) {% endhint %}
How to Setup the Code Base 
Step 1: Clone the message-gateway source code into your local machine from GitHub.
On Windows
$ git clone https://github.com/openMF/message-gateway.git
On Ubuntu:
$ sudo git clone https://github.com/openMF/message-gateway.git
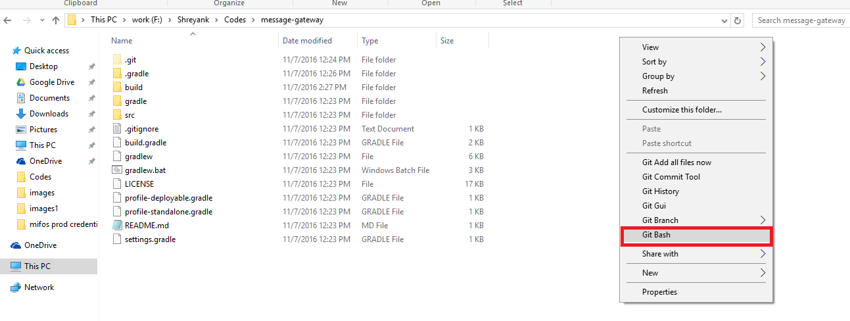
Step 2: Open the source code directory on your local machine. Now, open Git Bash in this folder (through the right-click context menu).
On Windows:
On Ubuntu:
Simple change your current directory to the message-gateway directory by entering the following command:
$ cd message-gateway
How to Build the Code Base
Step 1: Next, we need to generate the .war file. This can be achieved by using the commands mentioned below:
On Windows:
$ gradlew clean build -Pprofile=deployable
On Ubuntu:
~/message-gateway$ sudo chmod 777 gradlew

~/message-gateway$ sudo ./gradlew clean build -Pprofile=deployable
Step 2: Create a database with the name `messagegateway`.
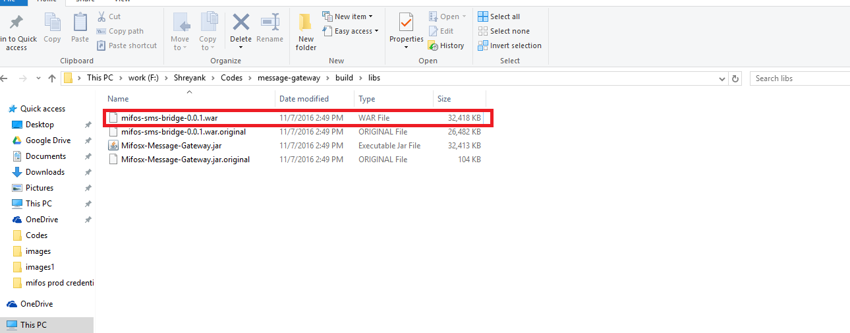
Step 3: Open the message-gateway source directory and navigate to build >> libs. Copy the message-gateway-0.0.1.war file.
On Windows:
On Ubuntu:
~/message-gateway$ cd build

~/message-gateway/build$ cd libs
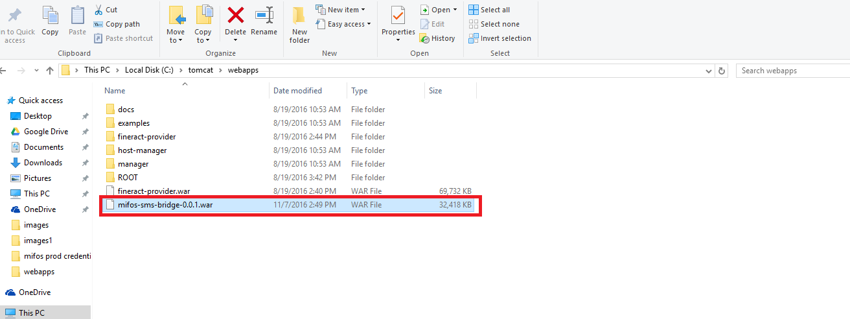
Step 4: Navigate to Tomcat >> webapps and paste the message-gateway-0.0.1.war file into this directory.
On Windows:
On Ubuntu:
~/message-gateway/build/libs$ sudo cp message-gateway-0.0.1.war /home/tomcat7/webapps/
How to Run
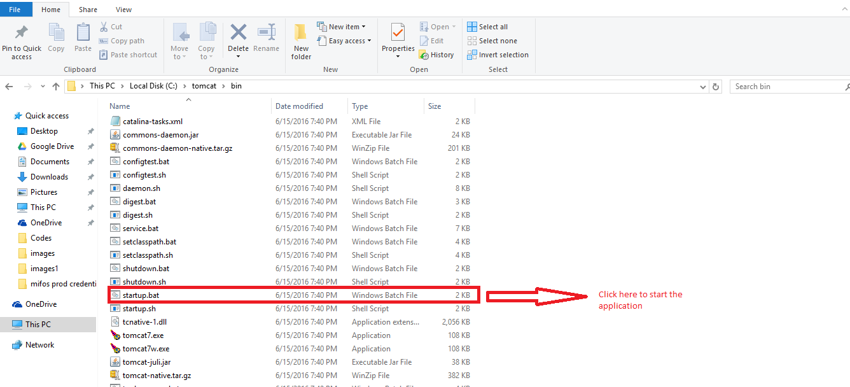
On Windows:
Navigate to Tomcat >> Bin directory and double click on startup.bat to start the application.
On Ubuntu:
Now navigate to the Tomcat >> bin folder and execute the following command to start the application:
~/tomcat7/bin$ sudo sh startup.sh
How to Configure Message Gateway
{% hint style="danger" %} You can download the REST Client from this link:
http://download.wiztools.org/rest-client/archive/index.html {% endhint %}
Open the REST Client and perform the following steps:
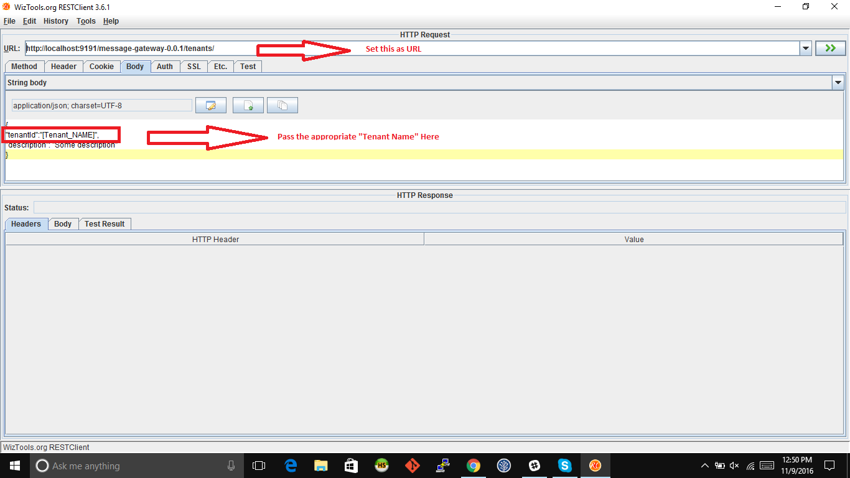
Step 1: When you open the REST client set the URL as: http://localhost:9191/message-gateway-0.0.1/tenants/. HTTP method should be set to "POST". Finally, in the HTTP request body pass the following data:
{% hint style="info" %} {\ "tenantId":"[Tenant_NAME]",\ "description": "Some description"\ }
NOTE: Pass the appropriate "tenantId" {% endhint %}
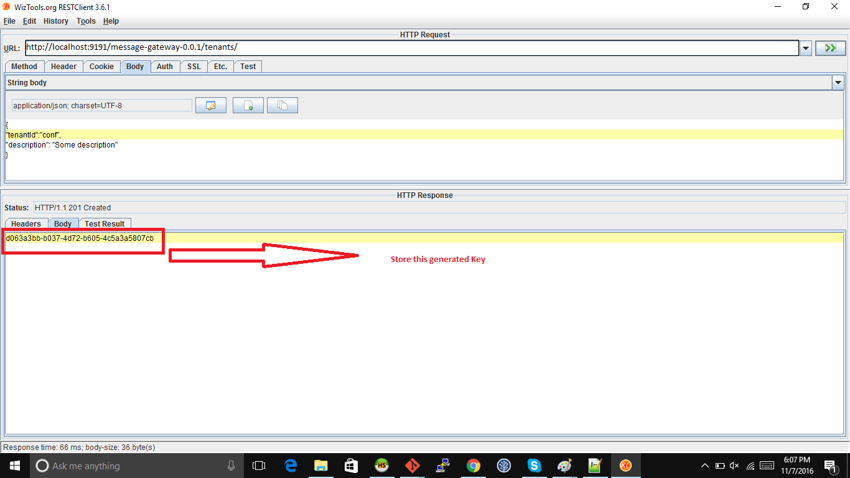
When we fire this request, "tenant app key" is generated as a response. This is shown in the screenshot below:
Step 2: In this step, set REST client URL ashttp://localhost:9191/message-gateway-0.0.1/smsbridges. HTTP Method should be set to "POST". In the HTTP request body, pass the following data:
{% hint style="info" %} {\ "phoneNo": "+12345678901",\ "providerName": "Twilio SMS",\ "providerDescription": "Twilio SMS Provider",\ "providerKey":"Twilio",
"countryCode":"+xx",\ "bridgeConfigurations": [\ {\ "configName":"Provider_Account_Id",\ "configValue":"ACcb95cd9fb2e7d72f85c06aea6473f7iv"\ },\ {\ "configName":"Provider_Auth_Token",\ "configValue":"fed820a353def95f1m6fad077fef670e"\ }\ ]\ }
NOTE: phoneNo, providerName, configName, configValue, configName, configValue are to be set based on the individual subscription. {% endhint %}
Pass these HTTP headers in the REST client:
| Header | Value |
|---|---|
| Fineract-Platform-TenantId | {Pass the same Tenant ID that you have set in the previous step} |
| Fineract-Tenant-App-Key | {Pass the same "Tenant app key" that is generated in the previous step} |
Once headers are set, fire the HTTP request.
Step 3: In this step, set REST client URL as http://localhost:9191/message-gateway-0.0.1/sms/. HTTP method should be "POST". In HTTP request body pass the following data:
{% hint style="info" %}
[{\ "internalId":"55",\ "mobileNumber":"+91xxxxxxxx80",\ "message":"Hello from Staging",\ "providerId":"2"\ }]
NOTE:
- Set the appropriate "mobileNumber" to the phone number you want to send the message to.
- Set your required "message".
- Set "providerId" to the value generated in the previous step. {% endhint %}
Pass the same HTTP headers that we passed in the last step.